Is your morning routine disrupted by your Keurig displaying a stubborn “Not Ready” message? You are not alone, but fortunately, it is usually easy to fix.
In this article, we are going to see why this happens and how you can get your Keurig back to brewing your favorite coffee in no time.
Why My Keurig Says “Not Ready”?
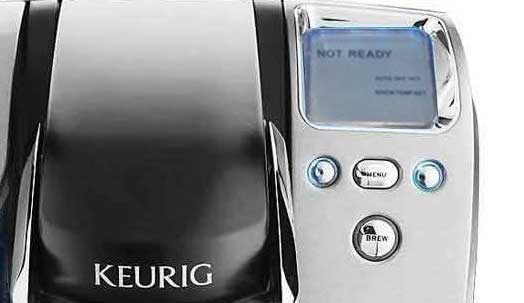
The “Not Ready” message on your Keurig can be frustrating, but it is the way your coffee machine is telling you something is off.
Here are the main reasons why this alert appears:
- If the water reservoir is not properly seated or filled, your Keurig won’t start the brewing process.
- Your Keurig might need descaling. Over time, calcium deposits can build up in your machine, affecting its performance.
- Coffee grounds and dirt can clog the needles or affect sensors, leading to the “Not Ready” message.
- Sometimes, the issue is as simple as the machine not receiving power correctly.
How To Fix The “Not Ready” Issue On Your Keurig
Now that you know what causes the “Not Ready” message, you can start fixing the issue on your own.
Here are a few tried and tested solutions to help you get your Keurig back to its coffee-brewing glory.
Power Cycle Your Keurig
Power cycling your Keurig coffee machine is a simple troubleshooting step that works wonders across a range of electronic devices.
Power cycling can help reset the Keurig’s internal systems.
- Turn off your Keurig and unplug it from the electrical outlet.
- Wait for about 5 minutes. This pause allows the machine to reset.
- Plug the Keurig back in and turn it on.
- Try to brew a cup of coffee to see if the issue is resolved.
Check And Refill The Water Reservoir
An empty or improperly seated water reservoir can also trigger the “Not Ready” message.
- Step 1: Remove the water reservoir and check if there is enough water. If it is low, fill it to the fill line.
- Step 2: Make sure the reservoir is properly seated and locked in place. A loose connection can prevent the machine from detecting water.
- Step 3: After reseating, turn the Keurig on to see if the problem persists.
Make Sure The Handle Is Properly Secured
The “Not Ready” message on a Keurig coffee maker can sometimes be resolved by making sure that the handle is completely lowered and clicked into place.
This is because Keurig machines require the handle to be securely closed to start the brewing process. If the handle is not fully closed, the machine may not recognize that a K-cup has been inserted, or it may not be able to puncture the cup correctly, leading to the “Not Ready” message.
Here is a step-by-step approach to address this:
- Open the handle to make sure that there isn’t a used K-cup still inside. If there is, remove it. Then, insert a new K-cup if you are planning to brew a beverage.
- Firmly close the handle until you hear a click. The click indicates that the handle is fully closed and the machine is ready to brew.
- After closing the handle, check the display on your Keurig. If everything is set correctly, the “Not Ready” message should disappear.
Clean The Needles
Coffee grounds can clog the needles, blocking water flow and causing the “Not Ready” message.
- Step 1: Turn off and unplug your Keurig for safety.
- Step 2: Use a paperclip to gently clear away any coffee grounds blocking the needles. Keurig machines typically have two needles: one where you insert the pod and another on the bottom of the lid.
- Step 3: After cleaning, run a water-only brew cycle to ensure the needles are clear.
Descale Your Keurig
Hard water can leave calcium deposits in your machine, which can interfere with its operation.
Follow these straightforward steps to descale your machine:
1. Prepare Your Materials
- Use either Keurig’s descaling solution or distilled white vinegar.
- Large ceramic mug big enough to catch the dispensed liquid.
- Fresh water is required for both the descaling mixture and rinsing cycles.
2. Preparation Steps
Remove the water reservoir from your Keurig and take out any water filters.
Pour one-third of the descaling solution into the reservoir, then fill the rest with fresh water up to the maximum line.
3. Begin Descaling
Place your mug on the drip tray, lift the coffee maker handle, select the largest cup size, and press the Brew button to start.
After the cycle, throw away the mug’s contents. Repeat the process, but before starting the second cycle, wait for the Brew Indicator Light to stabilize, then turn off the machine. Let it sit for 30 minutes.
4. Rinse the Machine
After the wait, hold the Brew button to dispense the rest of the solution, then discard.
Run three cycles with 12 ounces of fresh water only, discarding the water each time to ensure all descaling solution is removed.
5. Final Steps
Allow your Keurig to cool.
Clean the water reservoir thoroughly and refill with fresh water.
Perform twelve rinsing brews using the largest cup setting to eliminate any remaining descaling solution traces.
6. Reassemble and Restart
Put the water filter back in place.
Plug your machine back in, and it is ready for use.
Total Time: The entire process should take about 45 minutes.
NOTE: If using distilled white vinegar, mix it with an equal part of water before use. For model-specific instructions, consult your Keurig’s user manual.
Check For External And Internal Damages
Sometimes, physical damage to the machine or its components can cause functional issues.
- Step 1: Inspect the power cord, plug, and the machine itself for any visible signs of damage.
- Step 2: If you find damage, it is best to contact Keurig customer service for repair or replacement options, as attempting to fix it yourself could void any warranties.
Reset The Keurig Brewer
Some Keurig models offer a reset function that returns the machine to its default settings.
- Step 1: Consult your Keurig’s manual to see if your model supports a reset function and follow the specific instructions provided.
- Step 2: Typically, this involves holding down certain buttons for a few seconds.
- Step 3: After resetting, try to brew a cup of coffee.
Contact Support
If you have tried all the above steps and your Keurig still displays the “Not Ready” message, it may be time to consult with Keurig customer service. They will help you with further troubleshooting or to explore repair or replacement options.
Frequently Asked Questions
The “Add Water” alert appears when your Keurig’s water reservoir is either empty or not properly seated. Make sure the reservoir is filled to the recommended line and securely in place. This simple step helps your coffee maker function correctly and prevents brewing delays.
When you see the “Descale” notification, it is time to remove mineral buildup in your machine. Use a Keurig descaling solution to clean your machine. Run the descaling solution through your Keurig, followed by fresh water rinse cycles.
If your Keurig says “Prime”, it typically indicates that water is not flowing properly through the machine. To resolve this, check for clogs in the water line or needles and make sure the water reservoir is placed correctly. Cleaning the needles and the water reservoir can often fix this issue, restoring your Keurig to prime condition.
The “Brew Temp Set” message allows you to customize the brewing temperature. To clear this message and set your preferred temperature, use the arrow buttons on your Keurig to adjust the temperature setting. Once set, your Keurig will remember your preference for future brews, ensuring your coffee is always just the way you like it.
Conclusion
When your Keurig says “Not Ready” it can be a minor hiccup in your coffee routine. Most of the time, this issue can be easily resolved with a few simple steps. Regular maintenance, like descaling and cleaning, can prevent many problems.
Remember, if you are ever unsure or unable to fix the issue, contact Keurig support.